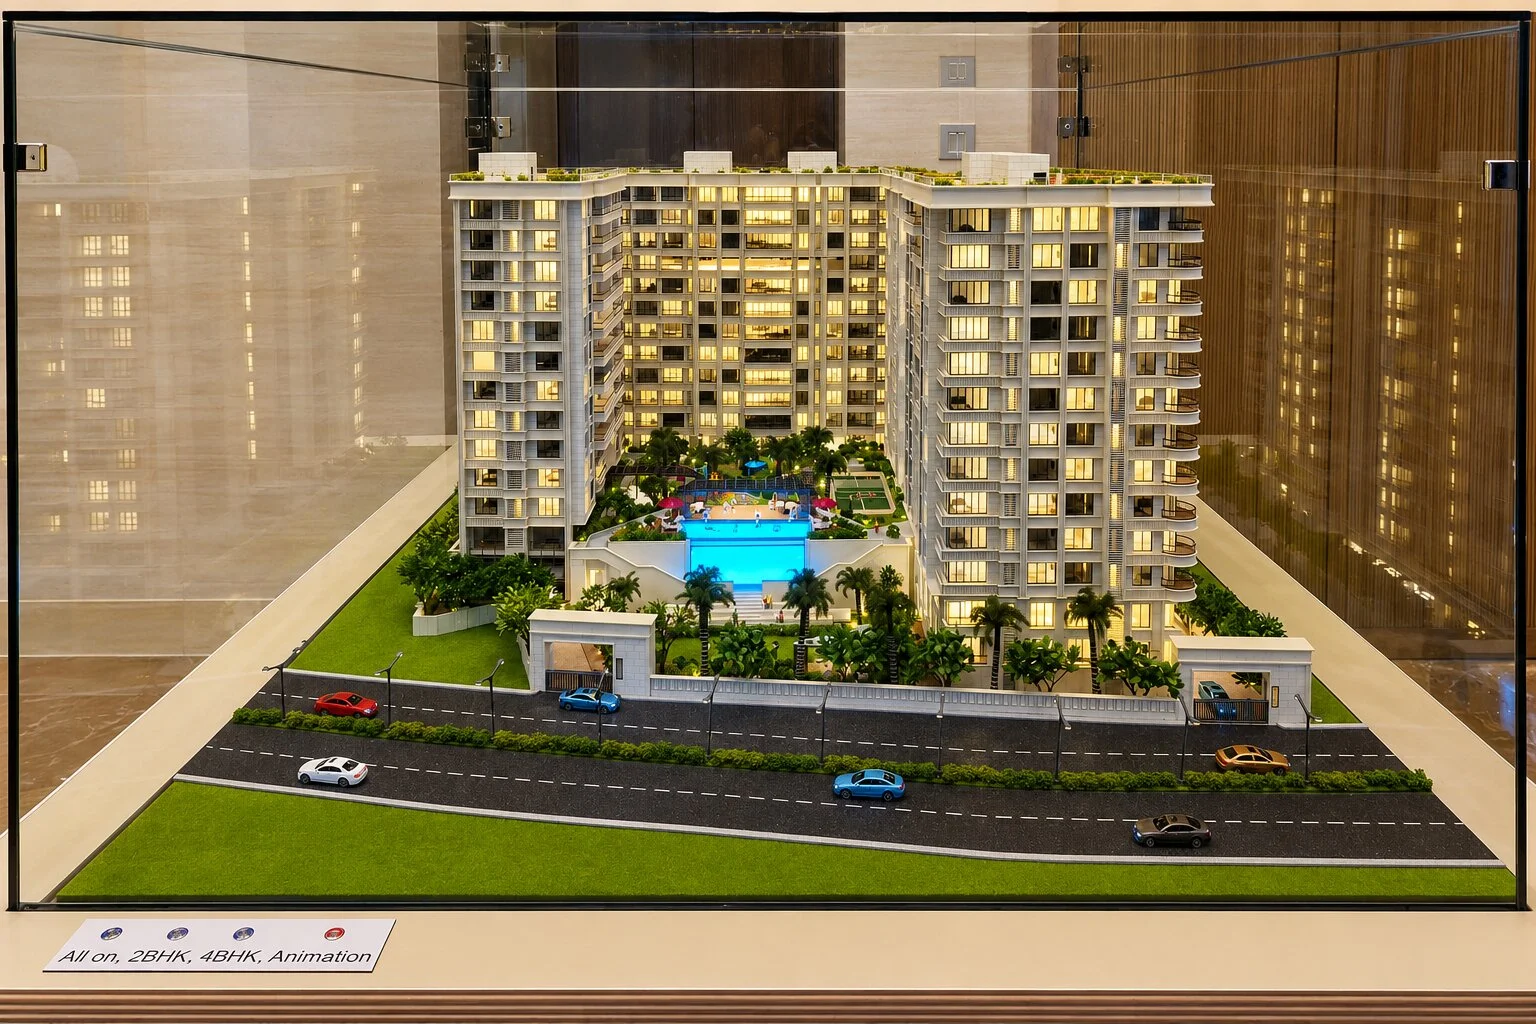
Most people who order a model start with the wrong question. They ask, “How big should it be?” The better question is, “What does the viewer need to see?” Size follows from that. Once you know the answer, picking a scale becomes much simpler, and a lot of expensive confusion goes away.
Scale is simply the ratio between the model and the real thing. At 1:100, one centimetre on the table equals one metre in the building. It sounds like a small technical detail, yet it controls nearly everything: how much detail you can show, how much space the model needs, how long it takes to build and what it costs. When you commission an architectural scale model, this is the first decision to get right.
What a Scale Ratio Actually Means
A ratio of 1:50 means the model is fifty times smaller than the building. Lower second numbers, like 1:20 or 1:50, give larger models with more visible detail. Higher numbers, like 1:500 or 1:1000, give small models that show the overall layout.
It’s easy to mix this up. People sometimes say a 1:500 model is “bigger” because the number is bigger. It’s the opposite. A helpful trick is to remember that you’re dividing the real size, so a larger divisor produces a smaller result.
Typical Scales for Different Projects
There’s no single right answer, but there are common habits that work well.
- 1:20 to 1:50 suits interiors, single rooms, facade sections and small houses.
- 1:100 is popular for villas, mid-sized buildings and detailed presentation models.
- 1:200 works for large buildings, towers and small campuses.
- 1:500 fits big campuses, neighbourhoods and many township layouts.
- 1:1000 and beyond show masterplans, districts and city-scale ideas.
Treat these as starting points. Your project’s shape, your audience and your display space will push the final decision one way or the other.
Detail Versus Overview
Here’s the real trade-off. A larger scale lets you show window frames, balcony railings, textured materials and furniture. A smaller scale gives you context: neighbouring roads, nearby buildings, parks and the way the project sits in its surroundings.
Ask yourself what story matters most. If the interest is in the architecture of one building, a bigger scale rewards close viewing. If the main question is how a project connects to a city, go smaller and include more land. Trying to show everything at once usually leads to a model that’s too big to move or too crowded to read.
Thinking About the Space Where It Will Live
Measure the room before you fix the scale. A model needs breathing space around it so people can walk around and look from every side. A good rule is to allow at least a metre of clear floor on all sides. If the model will sit against a wall, think about which faces will be hidden and plan accordingly.
Also check doors, lifts and corridors. A beautifully made model that can’t be carried into the building is a painful discovery. Mention the display location when you speak to your maker, because a good architectural scale model will help you balance size and handling right from the beginning.
How Scale Changes Cost and Time
Doubling the scale doesn’t just double the work. Because you gain extra detail to build, the effort can rise much faster. A model at 1:100 may have glazing bars, railings and interior layouts that simply don’t exist at 1:300. Each of those items takes time to design, cut and fit.
Smaller scales can also cost more than expected if the site is large, since the surrounding area needs contour work, roads, trees and many neighbouring buildings. The number of elements matters as much as the ratio.
Choosing Scale for Students and Competitions
Students often work with tight budgets and short deadlines. For a studio project, 1:100 or 1:200 is a sensible choice because it shows enough form without drowning you in detail. Competition juries usually prefer clean, well-judged models that make one idea obvious, so simple white or single-material pieces at a moderate scale often win over overloaded ones.
Whatever the case, check submission rules. Competitions sometimes specify maximum dimensions, base sizes or even materials. Reading these early prevents painful last-minute changes.
Mixing Scales in One Presentation
Many projects benefit from more than one model. A site model at 1:500 shows the context, a building model at 1:100 shows the design and a section or interior model at 1:20 shows how it feels inside. Together they let the audience zoom from city to room, in the same way digital tools let you pinch and zoom on a screen.
If budget is a concern, a single hybrid model sometimes works. A detailed main building can sit in a simplified, pale context made from plain blocks. The eye reads the focus first and the neighbours second.
Getting Proportions Right at Small Sizes
Tiny details can fool you. Walls drawn at real thickness may turn out too thin to build at 1:500, so makers thicken them slightly. Glass panels might be shown as a transparent sheet with fine lines instead of individual frames. Trees are often simplified into shapes that still feel natural.
This is not cheating. It’s how scale modelling works. The goal is for the model to look correct to the human eye, not to match every measurement literally. An experienced maker knows how far to push these adjustments without distorting the design.
Mistakes to Avoid When Choosing a Scale
Some errors are common. Choosing too large a scale and running out of table space. Picking too small a scale and being unable to show important details. Forgetting that lighting and display cases add to the overall size. And changing the scale late in the process, which forces a complete rebuild.
Settle on the ratio early, confirm it in writing and check it against the drawings. A five-minute conversation at the start can prevent a week of rework.
Scale and Materials Go Hand in Hand
Not every material behaves well at every scale. Thick card that looks fine at 1:100 can turn clumsy at 1:500, where walls need to be crisp and thin. Clear acrylic gives excellent glass at a larger scale, but at very small sizes a simple tinted sheet often reads better. Wood grain that feels lovely in a 1:50 house model can look oversized and heavy in a tower at 1:300.
A good maker thinks about this early. They may suggest swapping a material, thinning a layer or painting a detail instead of building it. If you notice a recommendation that departs from your drawings, ask why. Usually there’s a simple reason connected to how the eye reads the finished piece.
Reading Scale Bars and Drawings Correctly
One small trap catches many beginners. Drawings printed at a different paper size no longer match the printed scale. A plan labelled 1:100 on A1 paper will measure wrongly if it’s reduced to A3. Always use a scale bar or the digital dimensions, not a ruler on a printout.
If you’re sending drawings to a maker, include a clear scale bar and a few key dimensions, such as the overall length and one floor-to-floor height. It takes seconds to add and gives the maker a way to check that everything matches before work begins.
A Short Worked Example
Say you have a residential tower that’s 90 metres tall and you want it to stand comfortably on a sales desk. At 1:100, the model would be 90 centimetres high, which is a serious piece of furniture. At 1:200 it falls to 45 centimetres, a more manageable size. At 1:300 it drops to 30 centimetres, yet the windows and balconies may start to blur into lines.
In this case, 1:200 often gives the best mix. You can show floor lines, balcony edges and the podium clearly, and it still fits on a desk with some neighbouring buildings. Simple arithmetic like this helps you test ideas quickly before you speak to anyone.
Test Before You Commit
If you’re unsure, ask for a quick test. A small sample of a facade at your preferred scale, or a plain white massing block, can show how the final piece will read. Placing a rough block on the real display table for an afternoon also tells you things no drawing can, such as how it feels next to a window or how far people stand from it. Small tests cost little and can prevent a costly rebuild.
Final Thoughts
Scale is the quiet backbone of every model. Get it right and the piece feels natural: not too big, not too fussy, with detail exactly where people look. Get it wrong and even beautiful craftsmanship struggles to communicate.
Before you ask for quotes, decide what the viewer should learn, measure the display space and think about how the model will travel. Then discuss it with a trusted maker who can advise honestly. A well-chosen architectural scale model isn’t just a miniature of your building. It’s a clear, balanced way of presenting your idea, built at a scale that serves it.